Modeling And Unwrapping A Tank Track Made Simple
Created by D_Fast, a member of the team for the Point of Existence Mod for Battlefield 2
Tools:
3dsMax 6 or 7 and a general working knowledge of it.
Many maybe use to polygon modeling there track systems. But when it comes time to unwrapping them they can become a time consuming and just a pain in the kisser. Here I will show you a system that will blow u away. The concept is Lofting. Its a very nice tool. and overlooked by many.
*Note Click on images for a larger image* Larger images will open in a new window.*
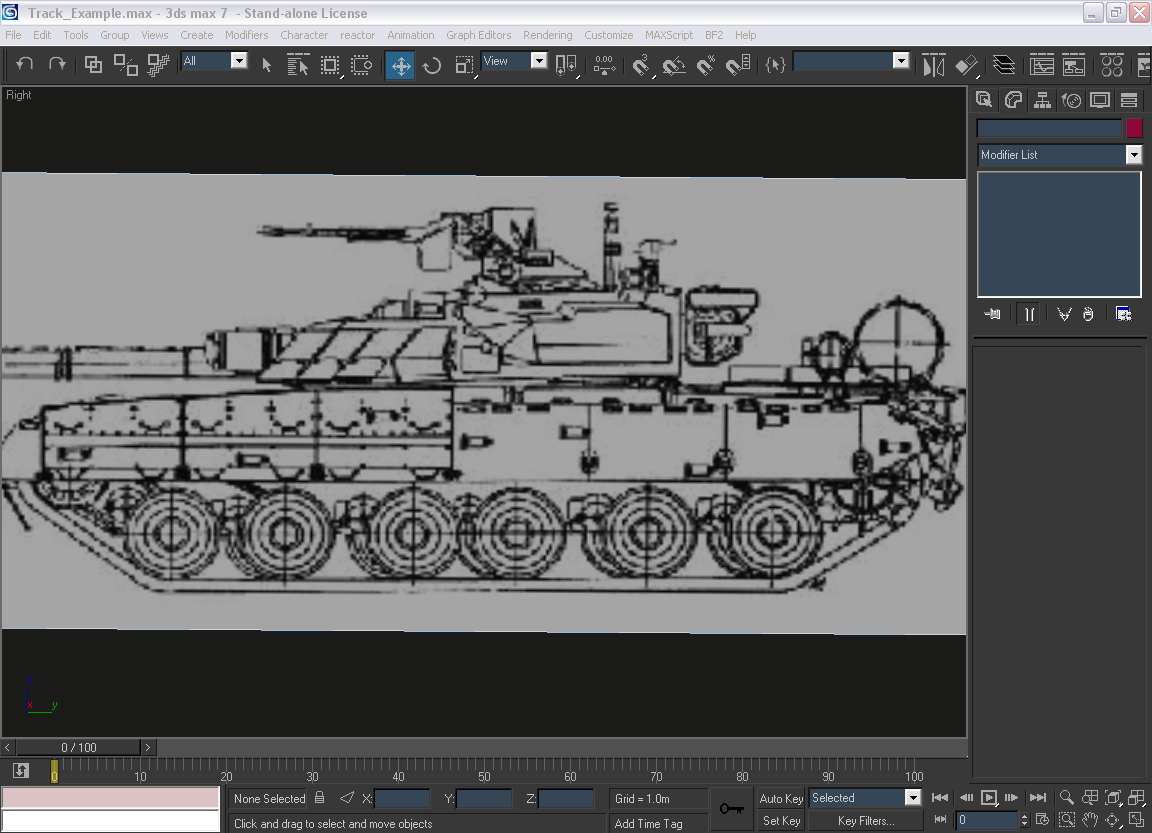
We start in a right or left viewport with a drawing off your track.
We will first be drawing the outlining shape of the track using "Splines"
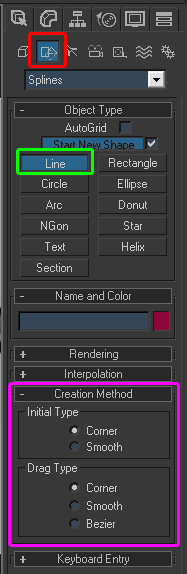
Goto your "Shapes Tab" choose "Line" In the "Creation Method" rollout set both
"Intail Type" and "Drag Type" to "Corner" This will better help u control the face count later in the tutorial.
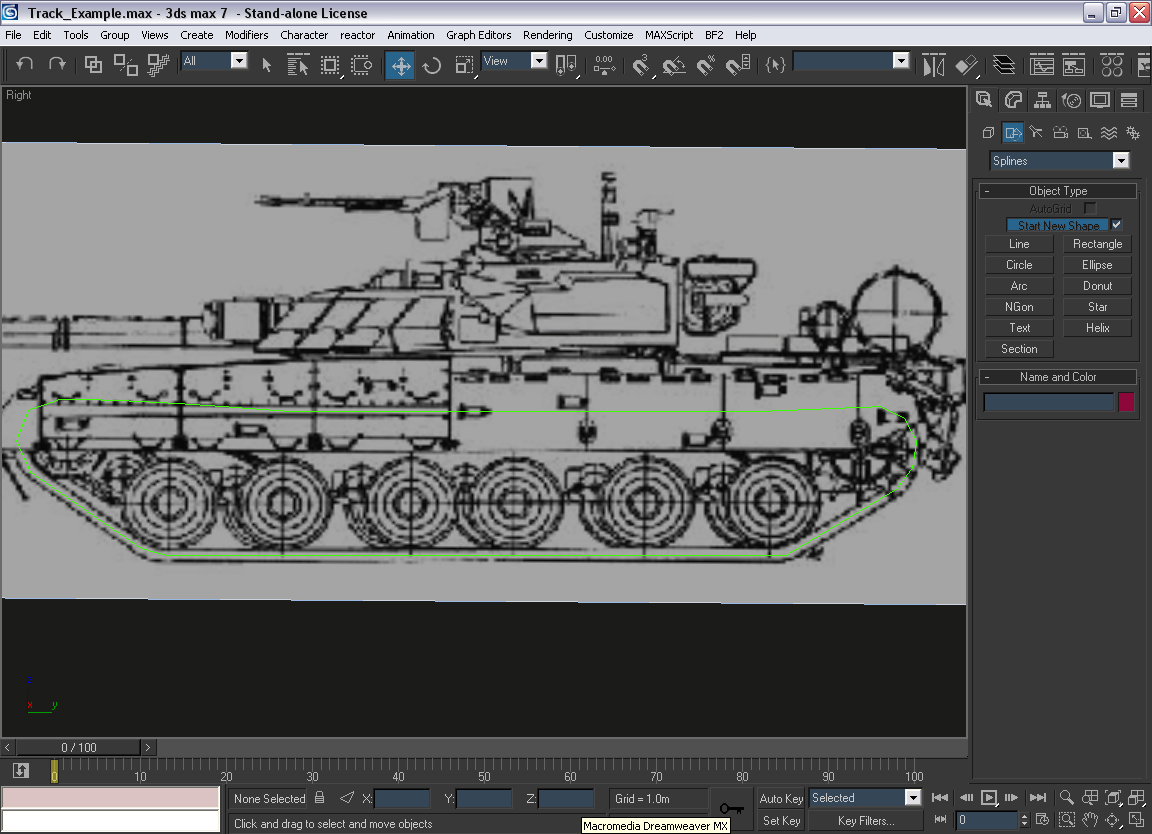
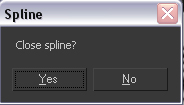
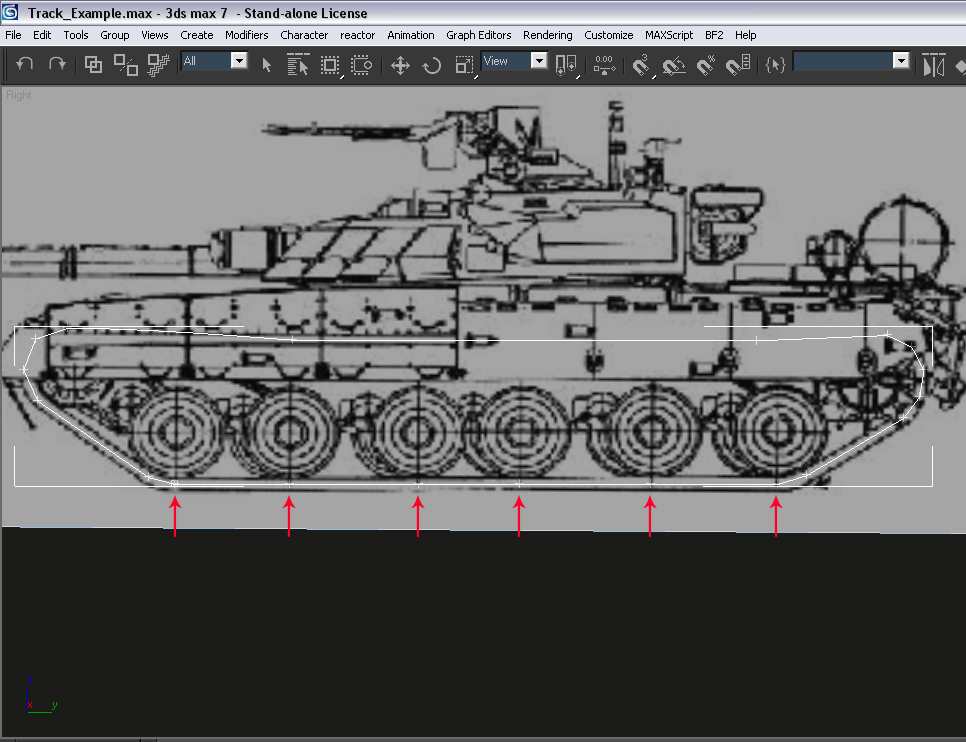
In your viewport click then release this will create a vertex. Click again will create another. Go around your template until you have the basic shape of the track. I would suggest trying to stay in the middle of the track as you go along. When you come around to the first vertex you placed, clicking on it will prompt you with a dialog box asking if your wish to close the spline.Answ er Yes.
At this point I would suggest naming this spline to something recognizable, such as "Track_Spline" Now that you have your basic outline Its time to think ahead and place vertex's where you know the track will animate up and down with the wheels.
This is done by choosing your Track_Spline, then selecting the "Modify Tab" selecting "Vertex" mode. Under the "Geometry" rollout selecting the "Refine"
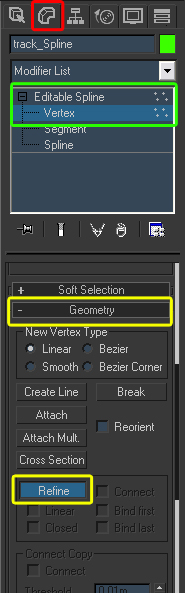
This tool will allow you to place additional vertex's where your road wheels will eventually be. Just click on the spline in the general area.
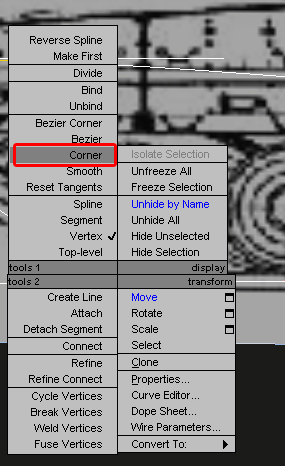
We don't want Bezier Curves on these newly created vertex's this will cause your face count to rise. We will now convert them to corner just like our initially created spline.Start by selecting all the vertex's then right click on one of them. In the menu select "corner" from the options.
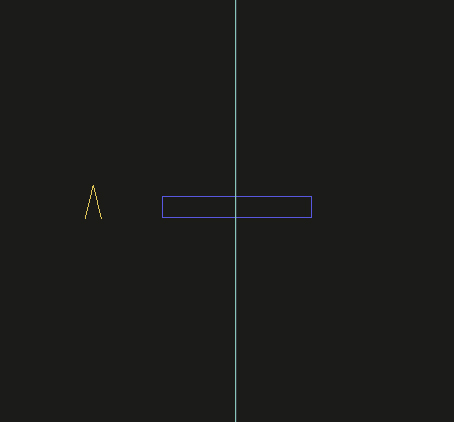
Now we need a contour shape to loft around this track_Spline. The thickness and width of this shape should be determined by vehicles drawings you may have. If you don't have any drawings in your scene that's ok to. this is after all only a tutorial on the concept. World and Local Rotations can be tricky when lofting. You may have to experiment with what viewport you create the fallowing shapes in. That and or once created rotating them and Resetting there X-form. By personal experience i've found top viewport works well. So in your top viewport create a rectangle from the shapes creation tab.
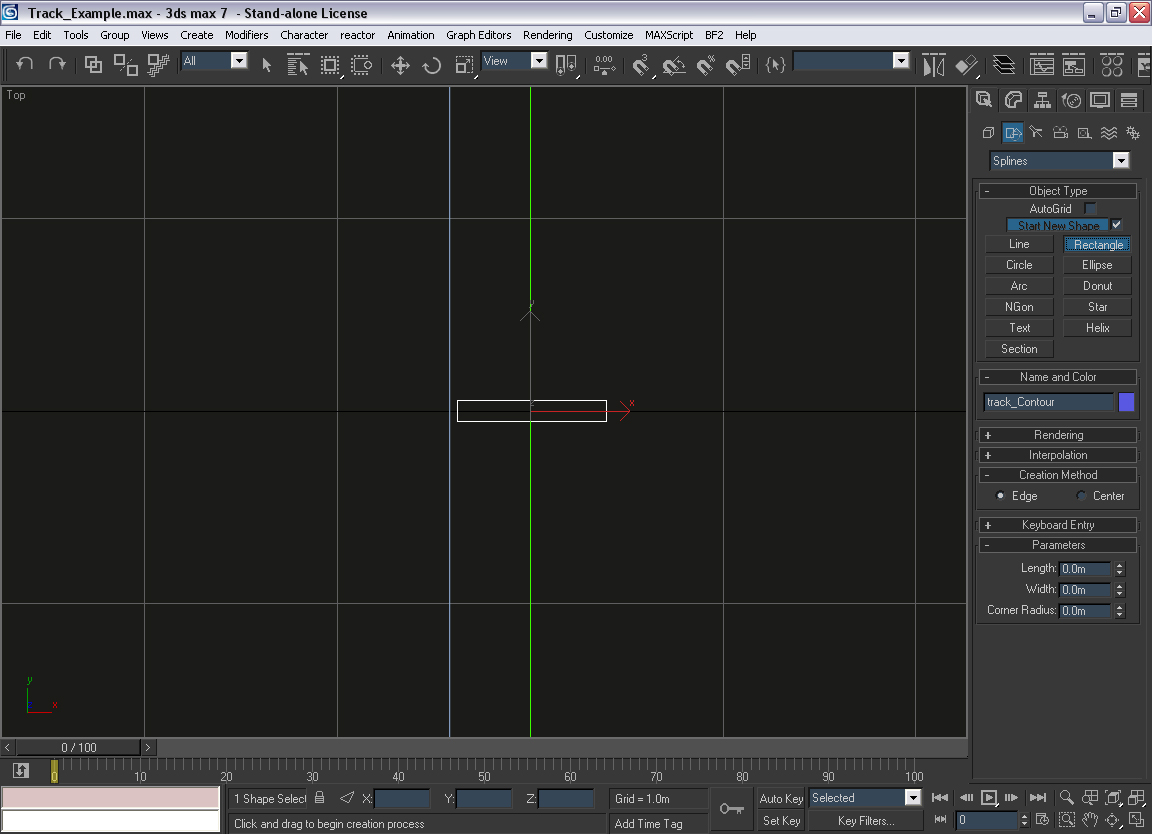
I also named this newly created shape to Track_Contour. Now most track systems have teeth or tines that come up from the center of the track We represent this in BF2mesh in the shape of an upside down "V" So while in the top viewport create another "Line" Using the corner method in the shape of a "V". I named mine to "Teeth_Contour"
So to recap. You should now have three spline objects in your scene Track_Spline,Track_Contour,Teeth_Contour. Besides your drawing. Now switch to a User or Perspective viewport So u can clearly see all your splines. Goto the create tab Geometry and from the drop down menu choose compound objects.
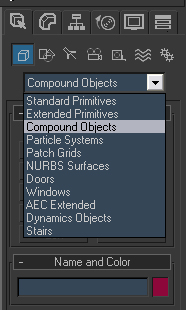
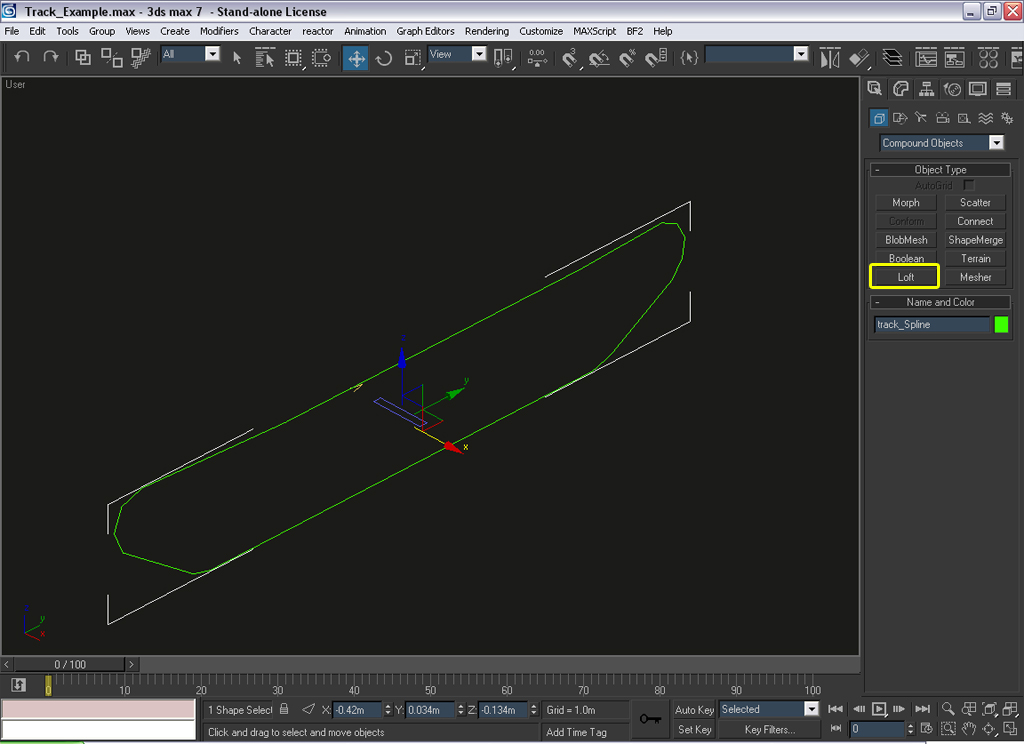
Here you'll find the Loft tool.
First select your Track_Spline. Then hit the Loft button.
Under the Creation Method rollout you will find a "Get Shape" button.
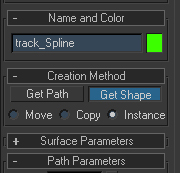
Select it then in your viewport pick the Track_Contour.Right before your eyes you have a Tank Track.
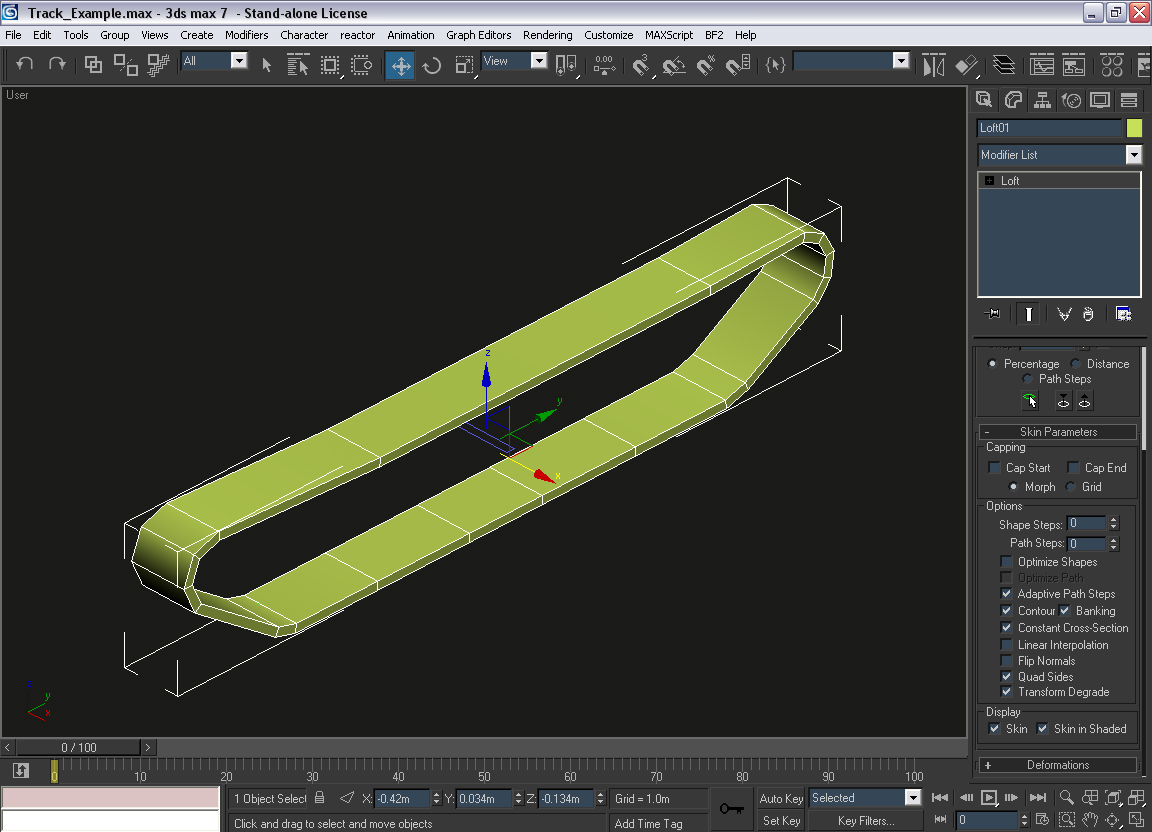
Now at this point we still need to optimize this. You can see from the edge view its has way to many faces.
Make sure your newly created Loft shape is selected. Goto the "Modify Tab" Then in the Skin Parameters rollout
Uncheck Cap End and Cap Start. **Note**
Left Checked would create two hidden faces we don't need or want.*
Also lower the Shape Steps and
Path Steps to Zero
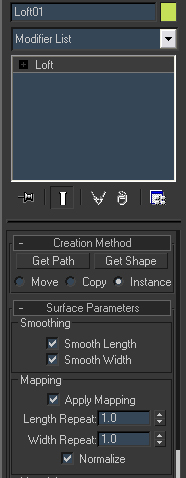
Still one more step, and the reason why I so love this creation method.
In the Surface Parameters rollout check the Apply Mapping box.
Now Select the Track_Spline again Create Tab-Compound Objects-Loft. This time select the Teeth_Spline.
It will generate that mesh for u as well. Remember to Apply Mapping and to remove the Cap End and Start after creation
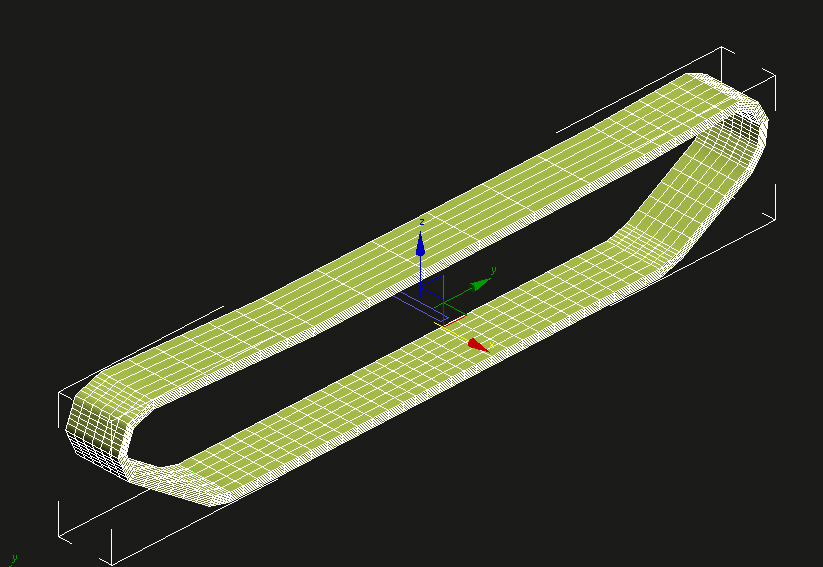
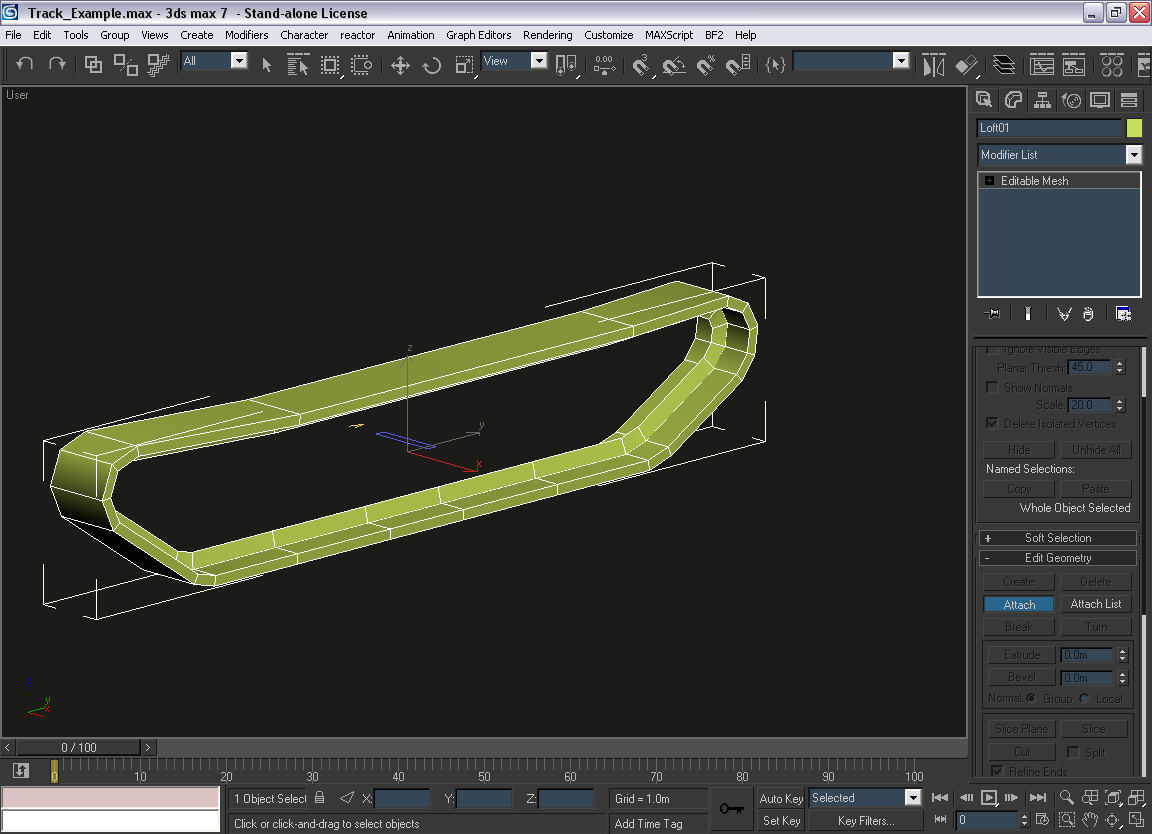
You should now have a nice low res, rather simple track mesh in your scene.
Now convert both loft objects to Editable Mesh This is simple down by Selecting both your Tack and teeth loft right clicking and choosing convert to Editable Mesh.
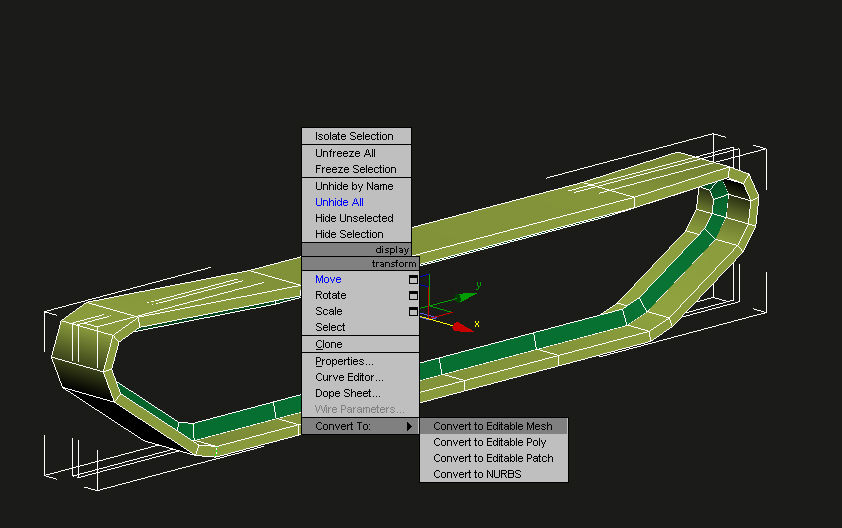
Now to attach them together. Start by selecting the track then then in the modify panel select Attach. Now pick your teeth mesh.
Now Lets see how much time this has saved on unwrapping this for textures.
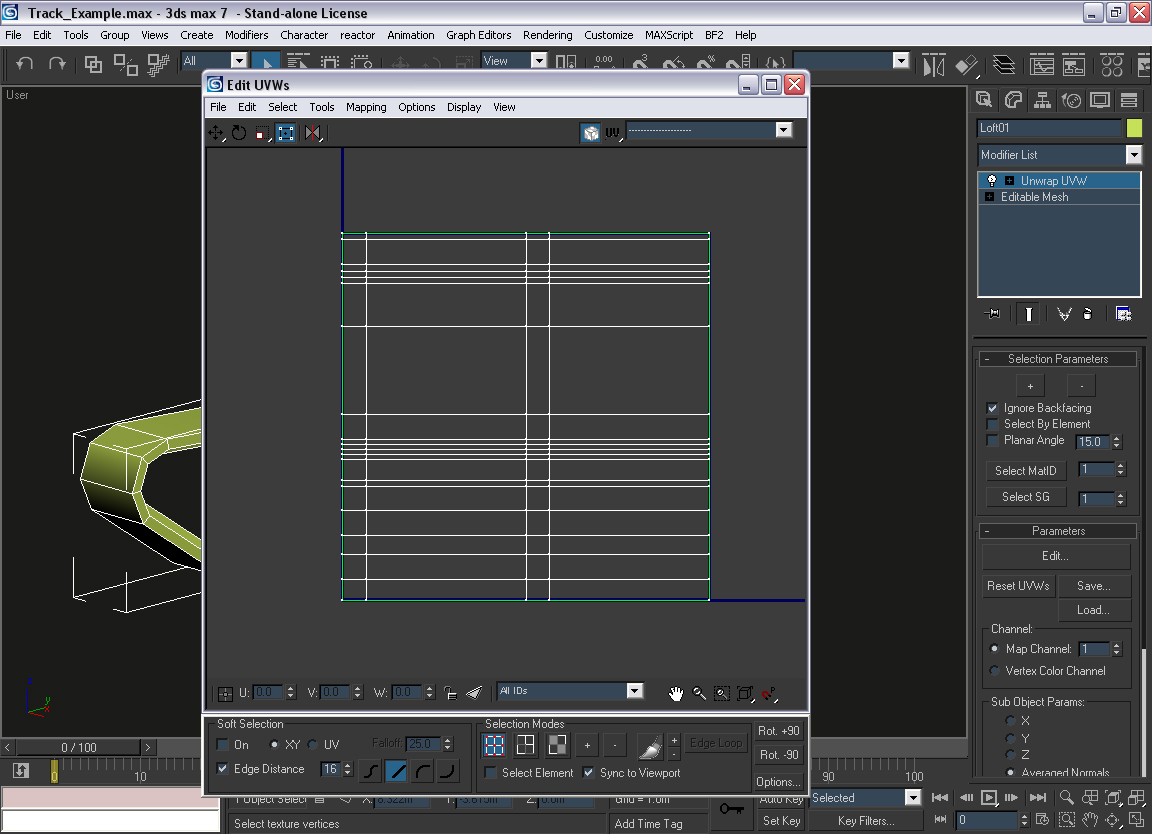
Add a UVW Unwrap modifier to your stack. And Hit the Edit button from the Parameters
rollout.
Well what do you know, I don't have to unwrap, the joys of "Apply
Mapping"
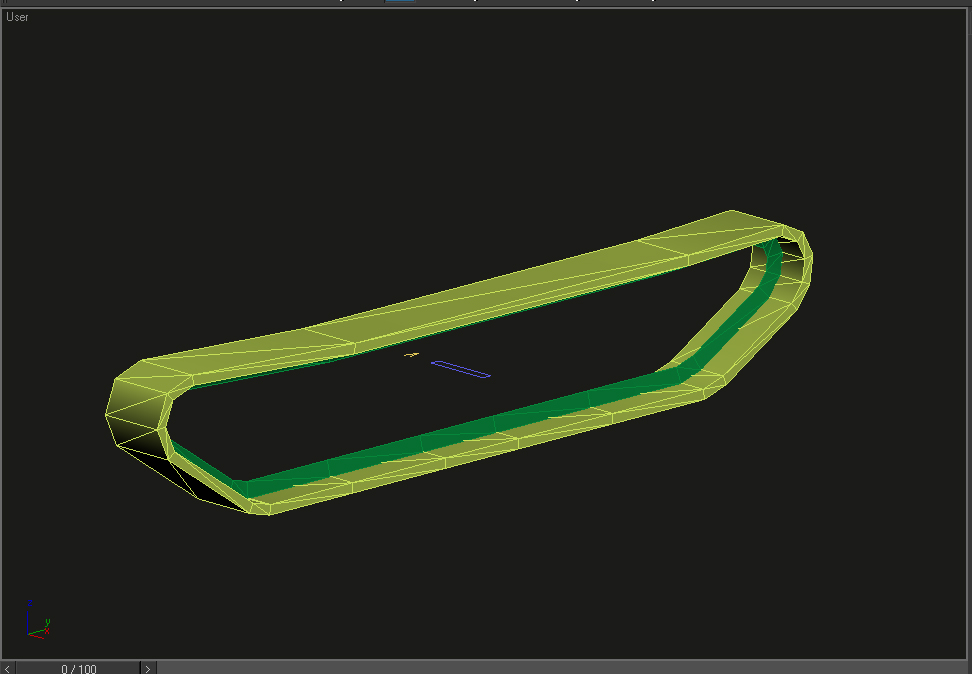
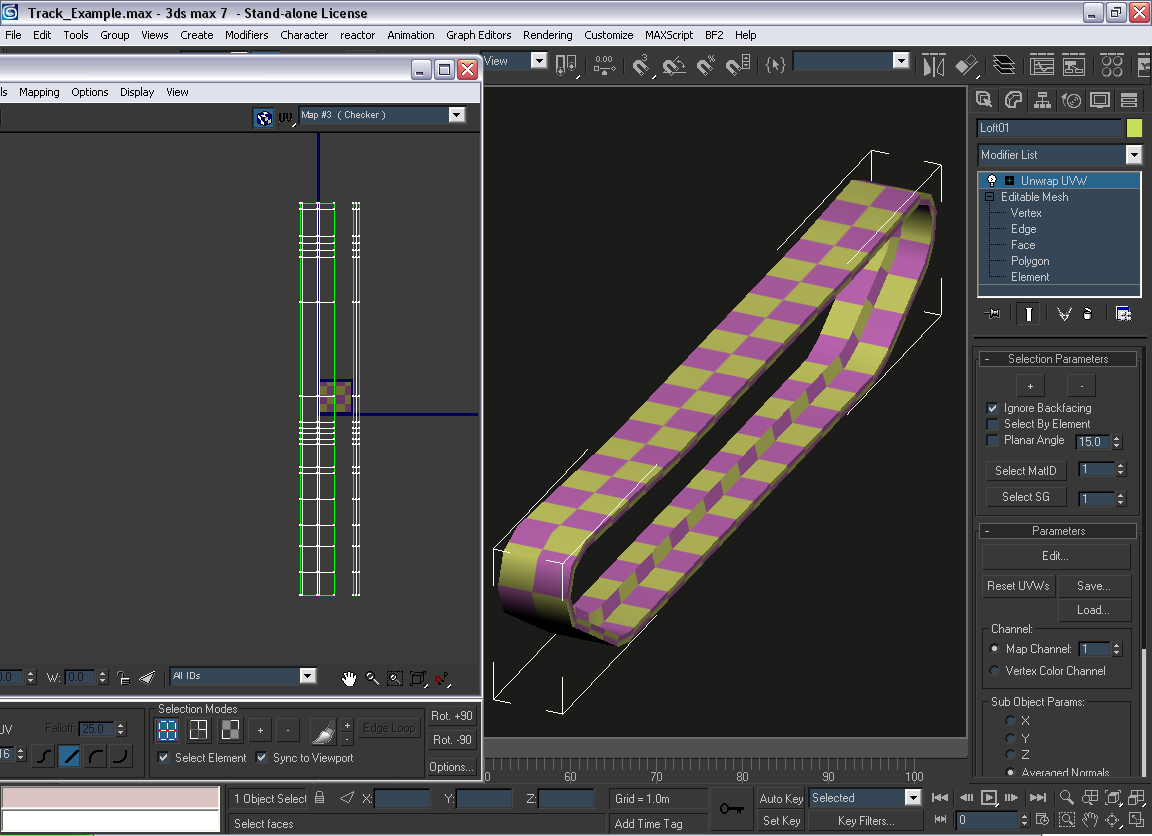
All that is needed here is a checker material and A little bit of scaling up and down.
A perfectly unwrapped Track ready for some textures.
Tutorial Provided By: D_FAST Point of Existence Developer.
PointofExistence.com